...

Calculate Your Capital Gains Tax in 5 Easy Steps

capital gains and tax forms

If you’ve sold stock, real estate, or other assets at a profit, you will have to pay income tax on that profit — known as capital gains tax. The amount you pay depends on your income bracket.

Here’s how to figure how much tax you owe. Bear in mind, this calculation is for long-term capital gains — on assets you owned for more than one year. (Short-term capital gains on assets held for one year or less are taxed as ordinary income.)

1. Figure the basis.

The basis is usually the purchase price plus fees or commissions you paid to make the purchase. You may also need to add reinvested dividends on stocks and other factors.

2. Figure the realized amount.

Start with the amount you sold the asset for and subtract any commissions or fees you paid to make the sale.

3. Subtract basis from the realized amount.

The result is your capital gain. (If the result was less than 0, you have a capital loss. Capital losses can be used to offset capital gains on your income tax return.)

4. Determine your tax rate.

For 2018 taxes, the rates are:
• 0% if your income for the same tax year is below $38,700 and you are filing as single, or below $ 7,400 if married filing jointly
• 15% if income is between $38,701 and $500,000 and you are filing as single, or between $77,401 and $600,000 if married filing jointly
• 20% if income is over $500,000 and you are filing as single; or over $600,000 if married filing jointly

Calculate your tax. Apply the tax rate percentage from step 4 to the capital gain amount from step 3. For example, if your tax rate is 15% and your capital gain is $3,000, your tax will be $450 (3000 x 0.15 = 450).

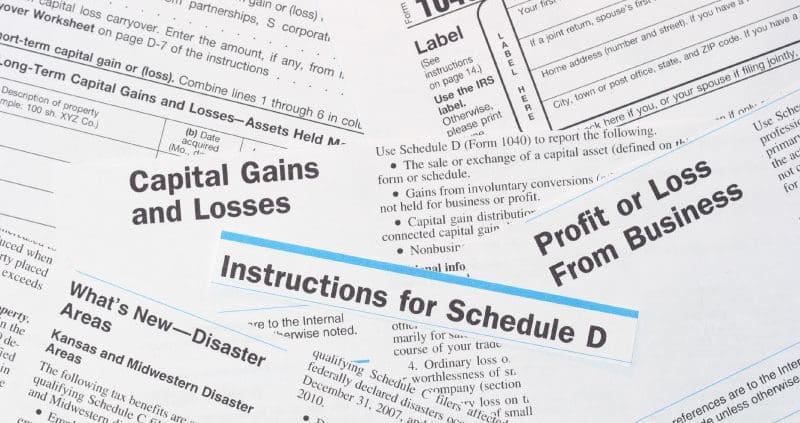
In most cases, capital gains and losses are reported on IRS Form 8949 and Schedule D of your income tax return.

If you have any questions about your capital gains tax liability, or any income tax questions, please feel free to contact your Xendoo tax professional. It’s all part of our service, which sets your mind at rest so you can stay focused on growing your business.


This post is intended to be used for informational purposes only and does not constitute as legal, business, or tax advice. Please consult your attorney, business advisor, or tax advisor with respect to matters referenced in our content. Xendoo assumes no liability for any actions taken in reliance upon the information contained herein.


Getting started with A2X for Shopify

About A2X for Shopify

A2X for Shopify imports your Shopify payouts and sales and posts them to your accounting system in a way that makes it easy to reconcile the sales, refunds, discounts taxes and shipping against the cash receipts.

A2X for Shopify has several benefits for accounting:

  • Reconciles Shopify Payments perfectly, including all fees
  • Accurate Shopify data imported automatically
  • Scales to support 1000’s of daily orders without sending 1000’s of individual invoices to the accounting system.
  • Supports multiple Shopify stores connecting to a single accounting system for multi-channel sellers.
  • Supports multi-currency sellers and multiple tax rates

Supported Payment Gateways

  • Shopify Payments – payouts will reconcile directly to bank deposits
  • PayPal – transactions posted to the accounting system with a clearing account
  • Amazon Pay – transactions posted to the accounting system with a clearing account
  • Authorize – transactions posted to the accounting system with a clearing account
  • Afterpay – transactions posted to the accounting system with a clearing account
  • Other gateways – posted to an accounting system with a clearing account, please contact support for specific gateway information.

Creating an A2X for Shopify account

Create a new A2X for Shopify account from the Shopify sign-up page.

If you already have an existing A2X for Amazon account, you will be asked to confirm you wish to create a new account.

Once your account is created it should look like this:

Now you are ready to set up your new A2X for Shopify account.

Connecting an A2X for Shopify account to your Shopify store

Click the green ‘Connect to Shopify’ button and input your Shopify shop in the form below and click ‘Connect’:

You will be redirected to your Shopify store and asked to log in and grant A2X permission to connect to your Shopify store. You must grant this permission in order to use A2X for Shopify.

Once the permission is granted you’ll be redirected back to A2X and your first payouts will begin to import into A2X – this process usually takes 10-20 minutes to begin populating in your account and for larger Shopify stores can take several hours to complete.

Once imported you should see the payouts like this:

Note: If you are not seeing any payouts after an hour, please check that your Shopify store uses the Shopify Payments gateway – if not you will need to enable the other payment gateways on the Settings > Connections page first.

Connecting to your accounting system

Click the Connect button for your accounting system and proceed with the connection process. You will be redirected to your accounting system to grant A2X permission.

If you are connecting A2X for Shopify to the same accounting system that you are already connected to with a different A2X account (either with Amazon or a different Shopify store), you should choose to use the existing connection, rather than create a new connection.

Configure the accounts and taxes for your Shopify sales

You need to configure A2X for Shopify to map your Shopify transactions into your accounting system.

A2X will offer to create several generic default accounts, or you can select your own individual mappings. We recommend working with your accountant on this initial setup as it will impact how the Shopify transactions appear in your financial reporting.

You can also customize how the A2X transactions are created, such as grouping the sales by country or province in the Settings > Invoice settings section of A2X. This can help if you have specific tax handling requirements for some countries.

Shopify Payments Gateway

The sales, refunds, and other transactions that are paid via Shopify Payments will be imported to A2X in their own payouts, these will be posted as a single batch of transactions and will always match perfectly to the corresponding deposits from Shopify.

Other Payment Gateways

If you use other gateways or payment methods on your Shopify store, these will be imported separately into A2X for Shopify. Typically you will need to define a clearing account for each one and post the corresponding payment proceeds to the same clearing account. The exact configuration for these accounts will differ depending on the payment methods.

You can enable, configure, and preview these settlements in Settings > Connections.

For more information about these mappings or if you have specific requirements that are not handled by the current mapping, please contact the A2X support team.

Post your Shopify payouts and reconcile them in your accounting system

Once you have connected and configured your account, you can send your payouts to your accounting system. To do that, click the Send link.

You will see the payout in your accounting system and be able to match or reconcile it to the corresponding deposit. For example here is Xero’s bank reconciliation screen showing the matching payouts.


This post is intended to be used for informational purposes only and does not constitute as legal, business, or tax advice. Please consult your attorney, business advisor, or tax advisor with respect to matters referenced in our content. Xendoo assumes no liability for any actions taken in reliance upon the information contained herein.


10 Steps to Get Started Selling on Amazon

the amazon website

Thinking of expanding your retail business into the biggest market platform in the U.S.? Amazon makes it easy for sellers of all sizes to get in on the action, even offering warehousing and fulfillment services.

Here’s how to become an Amazon seller.

1. Create an account.

Don’t use your personal Amazon account. Setting up a separate account for your business will make it easier to analyze and manage financials. You’ll be required to provide a credit card number, which will be used for charging any subscription fees and covering a negative account balance.

2. Figure your costs.

Amazon charges $39.99 per month for a professional account, which allows you to list an unlimited number of items. On top of that, there will be selling charges and other fees, which can total 15% or more of the sale price for some types of merchandise.

3. Figure your prices.

Your selling price must be high enough to make a profit, yet not so high that it will drive customers to your competition. Factor in your overhead such as Amazon fees and shipping costs. Also, research the prices being offered by competitors. Accounting software can make quick work of analyzing each price scenario so you can arrive at a price that’s both competitive and profitable.

4. Select a product listing category.

Make it easy for customers to find your merchandise … and for Amazon to display your item in search results.

5. Create an effective product page.

Remember, your customers are buying the item sight unseen. A product page that omits important information can cost you sales. (Would you buy a TV stand if you didn’t know whether it was big enough to hold your TV?)
• Use search keywords in the text to get a higher placement on Amazon’s search results page.
• Utilize the bullets section to communicate key features and benefits, in case viewers don’t scroll down to the full description
• Photograph(s) should be clear and informative. Showing the product from all sides and in use will help resolve customer questions or doubts.

6. Decide whether you will fill orders yourself or use Amazon.

Fulfillment by Amazon (FBA) handles the warehousing, shipping, and returns for you. This certainly saves a huge amount of work, but of course, they will charge you for this service. Another advantage of using FBA is that it gives you access to Amazon Prime customers who don’t want to pay for shipping.

7. Package your merchandise.

If you use FBA, Amazon will ship your products in its branded outer packaging. But the product’s packaging can display your own brand, a marketing opportunity that should not be overlooked.

If you’re doing your own fulfillment, you will need shipping supplies including:
• Scales for weighing the box and calculating shipping costs
• Strong packing materials
• Labels
• Laser printer

8. Test the market.

When you’re new to selling on Amazon, it’s smart to start with just a few products. This will give you time to become familiar with billing, payment processing, and customer service.

9. Adjust your sales strategy with metrics.

Offering reports on inventory, sales, and more, Amazon’s Seller Central Area can guide your decisions on inventory planning, promotions, and product presentation. Beyond that, measure and track everything you can so you’ll know for a fact what works and what doesn’t.

10. Follow through on customer feedback.

One of the biggest factors in a purchase decision on Amazon is the reviews of a product left by previous customers. Your goal is to have as many positive and few negative comments as possible.
• After purchase, send an email encouraging the customer to review the item.
• Include verbiage that asks them to contact you first before placing a negative review and give you a chance to resolve the problem.
• Respond to potential buyers in the questions section.
• Respond to misinformation in the reviews.

If you’ve completed these 10 steps, you should be well on your way to a successful career of selling on Amazon!


This post is intended to be used for informational purposes only and does not constitute as legal, business, or tax advice. Please consult your attorney, business advisor, or tax advisor with respect to matters referenced in our content. Xendoo assumes no liability for any actions taken in reliance upon the information contained herein.


eCommerce Sales Tax: 5 Steps to Making It Worry-Free

Selling online used to be a breeze. Get the order, collect the money, ship out the product. No hassles with sales tax like a brick-and-mortar retailer have to deal with. Nowadays, unfortunately, it’s up to 46 times more complicated for an eCommerce business. That’s because 45 U.S. states plus Washington, D.C., now require you to collect and submit sales tax — each with its own set of laws that you need to follow.

The process can be daunting — and time-consuming — for a small business. Here’s how to make it more manageable.

1. Determine which states you need to collect tax in.

As of June 21, 2018, that’s any state where you have customers. Before that date, each state had a set of criteria known as “sales tax nexus,” which determined whether you would have to collect tax in that state. The criteria included such things as the physical location within the state, distributor, or sales rep location and total sales value.

However, the old rules are now out the window. With the Supreme Court’s decision in favor of South Dakota (in the case of South Dakota v. Wayfair), physical presence in the state is no longer required.

Many questions on how this will play out remain unanswered. For example, the decision includes language that the state tax system should not discriminate against or place an “undue burden” on out-of-state businesses. It may take states a year or even longer work out their new rules.

In the meantime, learn more about sales tax nexus here.

2. Determine which products qualify as taxable.

Again, rules vary by state. Some of the most common non-taxable items are:

• Grocery food
• Clothing
• Certain types of books (textbooks, religious books)
• Prescription and non-prescription medicine
• Magazines and subscriptions
• Digital products (books, music, movies)

3. Register for state sales tax permits.

In each state where you’ve determined you need to collect sales tax, apply to the state’s department of revenue for a sales tax number. You need this number in order to legally collect tax from customers.

Make a note of each state’s tax due dates. You may have to file monthly, quarterly, or annually. This information will be included with the tax permit the state sends you.

In most states, your sales tax permit is also a resale certificate. That means you can buy items tax-free at retail, as long as you intend to resell the items.

4. Update your website’s shopping cart to collect sales tax.

For sales within the state where you’re physically located, check whether your state uses origin-based or destination-based taxation.
• Origin-based: You charge the state, county, and city rates that apply to the location you’re shipping from.
• Destination-based: You charge the rates that apply to the shipping address.

In some states, shipping charges are also taxable. Most shopping carts allow you to add this function.

If you use drop shipping, you’ll have to work with your dropshipping supplier to decide who will be responsible for collecting sales tax.

5. File your return.

File a return for every state and every due date, even if you had zero sales in that state or time period. If you don’t file, you could be slapped with a penalty, or even lose your tax permit.

Be prepared to fill in the tax return form by county, city, and other special taxing districts. This is where automated software can make your life a lot easier.

Save money by filing on time or early. Some states give a discount for filing on time. And some need a few days to process payments. So even if you file on the due date, the money won’t reach the state’s bank on that day and you will be charged a late fee (plus interest on the amount of tax due).

Xendoo makes processing sales tax easy for eCommerce businesses. By integrating with both your business software and your bank, transactions are entered automatically in your books. Plus, each entry is tax coded as it happens, so there’s no last-minute rush at filing time. With the hassles out of your way, your time and energy are free to focus on growing your business.


This post is intended to be used for informational purposes only and does not constitute as legal, business, or tax advice. Please consult your attorney, business advisor, or tax advisor with respect to matters referenced in our content. Xendoo assumes no liability for any actions taken in reliance upon the information contained herein.


3 Great Cash Flow Ideas for Retailers

What do a used book store, garden nursery, and boutique clothing shop all have in common?

No, this isn’t the set up to a joke. Unfortunately, all three types of businesses are at risk of failing if their cash flow isn’t in good shape. According to the Small Business Administration, “inadequate cash reserves” is a top reason small businesses close their doors for good.

So whether you sell novels, shovels, or dresses with ruffles — if you’re a retailer, cash flow is king.

What exactly is cash flow?

Think of it like a checking account. Cash flow looks at all the money coming in and out of your business each month. If there’s more coming in than going out, you’re in the green! If you’re spending more than comes in, read on. That means your cash flow is negative and your business could be in trouble

Here are three simple ways to get your cash flowing in the right direction.

1. Bundle products

If you sell several accessories apart from your core offering, try packaging them together with a small discount. This can also be an effective way of clearing out dead stock while creating goodwill with your customers, who feel like they’re walking away with a great deal.

2. Understand the risks of discounting

If you do decide to bundle products or offer another type of sale, make sure you know exactly how that will impact your bottom line. You should know the profit margins on every product you sell and your overall cost basis – it’s the only way to determine if you’ll break even with the sale or take a loss.

3. Encourage repeat business

Offering perks or freebies to returning customers helps create loyalty and makes it easier for them to choose you over other options. Go old school with a punch card, get creative with a contest, or print an offer on receipts that are good for a future purchase.

If you’re struggling to determine the state of your cash flow, it could be time to call in for some backup. With Xendoo’s suite of affordable bookkeeping and consulting services, you’ll be able to spend more time at the “cash-out” bringing the cash.


This post is intended to be used for informational purposes only and does not constitute as legal, business, or tax advice. Please consult your attorney, business advisor, or tax advisor with respect to matters referenced in our content. Xendoo assumes no liability for any actions taken in reliance upon the information contained herein.